Pretty Poinsettia

If one thing identifies it as Christmas Time for me is the  Poinsettia. Those rich deep colours or red and green are symbolic and it isn’t until I see them around and have one on my dining table that I get that feeling  – which I can’t quite explain, but best described as excitement of the season of ahead, shared with family and friends.

So naturally, I have been dying to make a card with a Poinsettia with my Nonna’s table cloth in mind (with the cirgarette burns from Nonno Nando). She had a beautiful table cloth that came out only at Christmas.

Now this card is not all green and red as probably expected or what I had intentially set out. I have used a retired Designer Series Paper from last year that I have overlooked of late, but I feel the combination is Christmassy with a fresh twist on it and the Poinsettia is the star. I used the petal builder punch and also made other flowers which gave the cards different varieties – but all very pretty in their own right.

Which one is your favourite?


Rudolph

Let me begin this post with saying that if you really don’t think you can, you will be surprised an how you actually can. If you put your mind to it, add a little passion, determination and time….. it will come!


If you were to see my first card I made a few years ago ( it was for an invitation to a New Years Party that was to be held at my place) you would cringe – seriously. I sent the invitation to my dear friend Kathy ( a very creative and talented person) had a little chuckle when she saw it – IT WAS THAT BAD. Thank goodness I have no remaining evidence of that invitation, ….BUT  i must add that the party was AWESOME… LOL 😉

Now looking back over the past few months at my creations, each card I have made has been better than the last and my confidence has grown and it is showing through each card that I have made.


Now this little card I found last night as I was looking through the many, many blogs that offer so much inspiration, ideas and even tutorials, I cam across this blog that had a cute Reindeer using the Owl Punch. You can pop over to http://flowerbug.typepad.com/my_weblog/2010/11/punch-art-reindeer.html and take a look!

Here is my version and I think this Rudolph is irresistable! Who would have thought that one punch could be so versatile!


A little warning, this card does take some time to make, and I made 6 in the one sitting but it is worth the effort! So to begin, I used the body of the owl and punched 2 pieces from Soft Suede card stock, 1 of which I just took the feet off, the other one I took the feet and one ear (to make the tail). I then cut 4 long strips for the legs, I made the antenna by drawing freehand on black card stock then carefully snipping them out. Always using the Owl punch, I punched a large circle from ‘Real Red” card stock which was used for the nose and for the eyes I raided my sons craft box! I softened the edges by daubing with ‘Soft Suede’ Ink, and for the hooves I used the heart from the punch using some left-over Chocolate Chip. Another great thing about this card is it uses all your little off cuts – so nothing goes to waste!

How easy is that! Never thought I would be able to make something like this a few years back….I am excited to see what time and practice and experience will lead me to!!!!


Ciao for tonight xx


Dashing for Dasher!

I haven’t been able to craft for over a week due to a very bad back, so sitting at a table for a few hours was absolutely out of the question, however that didn’t stop me looking  at my boxes from the lounge wanting to get stuck into it and pass the time. it gave me lots of time to browse the Ideas Book and Catalogue.

The last 2 days I have been relatively pain free and  just tonight I just couldn’t hold out anymore, nor could my Dear Daughter Alyssa who had been asking me for the past few days when we were going to make cards. Most of you can agree that after a long challenging day, there is nothing better than to lose yourself in your craft! So with that in mind, I rushed to get dinner on, help the kids with their homework, get Dear Husband ready for his shift, then finally the night and the table were all mine (and Alyssa  – god love her!).

Alyssa and I pulled out all our tools ( I say ours as this has really become a passion for the both of us and time I love spending with her) and we stamped away. Although I have my vision of the card, she always comes up with little ideas and tonight it was the bow, rather than the standard she wanted to use the brads and how elegant the final look is.

I wanted to get started on another card, but had to share with you our little card with the elegant Dasher stamp.

Paper: Paper Stack in Neutrals

Card Stock: Real Red, Whisper White, Soft Suede

Ink: Soft Suede, Real Red, Versamark, White embossing poweder (for Dasher)

Accessories: Antique Brads, Real Red Satin Ribbon

One of the great things about Stampin’Up! and why I love their products so much is that they have put a lot of thought into the colours throughout all their accessories, Designer Series Paper, inks and card stock.  They have all been designed so that they co-ordinate so you don’t waste time trying to work out if you have the right shades and co-ordinating accessories.

Last week before my back went out I managed to finish the Christmas Eve Dinner Invitations for my family.

Here I used Cherry Cobbler, Old Olive Card Stock, Cherry Cobbler Ink, Old Olive ribbon  – there colours are a perfect match for Christmas!

I better get back to my cards as Midnight is nearing!!!!

Ciao xx

Precious Butterfly

Yesterday I received the package from my very first workshop with all the goodies that Stampin’ Up! has to offer. The storeman at work that receives my packages is mesmerized with my reaction each time I receive a box…. it begins with a high pitched squeal of excitement, followed by a small applause then a rush for the sciscors to open it up. Ricky now hangs around each time to watch what has become a ritual of sort – I think he just doesn’t understand how some-one can get so excited over paper. For those of you that are reading this post and follow my blog you do so as you love craft so  you can understand my excitement!

When I got home that afternoon, the exceitement continued when my kids went through the items of the box. Most satisfying is the reaction of my Dear Daughter Alyssa, who is as much a Stampin’ Up! devotee as I am. I watched her as she went through the Mocha Morning Specialty DSP, taking her time to look over each page, and enjoying the textured pages. I didn’t have to tell her what the name was – she already knew!

She was particularly excited about my purchase of the Heat Tool and her comment to me was… “THANK GOD MUM! At least the next time you emboss at 6am you won’t set off the fire-alarm and wake the neighbourhood!” talk about being told.

This is a picture of me and Alyssa on her communion day, makes me tear up! If it is one thing I am grateful for SU! is how it has brought me and Alyssa even closer together. Each night she asks me if we are making cards and so we sit at the dinning table, talking and sharing our passion. I just hope that we continue to share this time together for a long, long time. She is my Precious Butterfly!

The both of us unpacked the box, putting the items away in their place carefully and then got to work on making some cards. We decided to use the the Precious Butterflies stamp that is only available to Hostesses who hold a workshop. It is such a pretty stamp set and I adore butterflies. Alyssa likes this stamp out of all the ‘swirly’ stamps I have this is best for corners – she is right!

Card Stock: Whisper White

Brights Collection Paper Stack in Temptin Turquoise

Ink: Certainly Celery, Tempting Turquoise, Chocolate Chip, Perfect PLum

Tools: Rhinstone Brads, Hemp Twine, Button from personal range

Stamp Set: Precious Butterflies

Hosting a workshop is fun and informative— plus you don’t have to leave the house! There is also opportunity to receive free products of my own choice which is also a great incentive!’ So call me on 0413 444 334 for more details.

A Crafty Weekend.

I haven’t updated my blog recently as I have been busy busy busy preparing for my first class and the local community market which were both held on the weekend. There were many nights where I was burning the midnight oil in preparation for both of the events and lucky for me I had my gorgeous daughter Alyssa with me keeping me company who loves stamping  as much as me (if not more!)

The class was on Sunday and was my very first and I will admit that I was a little nervous  (okay, more that a little 😉 ), but I just wanted to make sure I got it right. I had a good little group and we enjoyed crafting outside in the alfresco area on the warm Sydney afternoon!

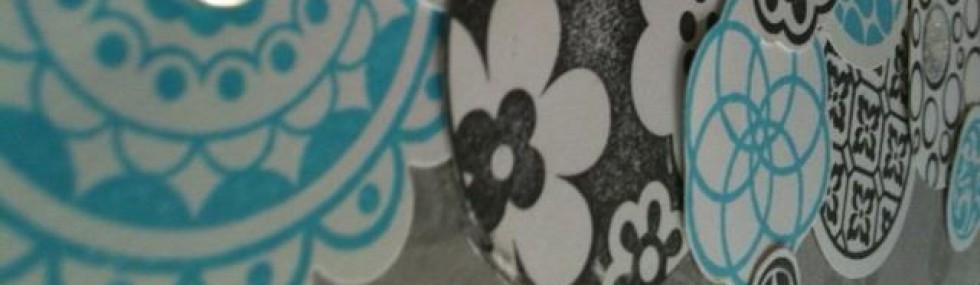
I prepared two cards and both used the Baroque Motifs stamp, the first stamp I was introduced to and consequently the first stamp I bought. I love the swirls and the romantic feel it gives your project. I LOVE swirls!

The first card was a simple cards but very schmexy, even if I say so myself!

Card Stock: Melon Mambo and Whisper White

Stamp Set: Baroque Motifs, Cottage Garden (for the butterflies)

Ink: Melon Mambo, Basic Black

Tools: Butterfly punch, snail adhesive, 2 way glue pen, pearls


The second card was a Christmas card. For some it may be a little bit early (and this was a topic of conversation) but I am can’t help but get excited this year. It may be because the past few years have not been very ‘Merry’ ones so now that I am finally in my dream home and we are all settled in, I can’t wait to kick off the season to be Jolly!

Anyway, back to the card…..

Card Stock: Cherry Cobbler, Old Olive, Whisper White

DSP: Jolly Holiday

Stamps: Circle of Circus

Ink: Cheery Cobbler, Old Olive

Ribbon: Old Olive, Hemp Twine

Tools: Scallop Punch, Eyelet Border Punch, dimensionals and snail adhesive

I love how the Baroque swirl is peeking through!

Here is another card that I made while sitting at my little stall happily enjoying the morning sun crafting away!

This time I used the Petite Pennants Stamp – too cute!

Now I am off to make my ‘Christmas Eve Dinner’ invitations with Alyssa, so look I will definitely keep you posted!

Christmas Class Dec 2011

Friday, 9th December

Time: 7.30pm

Location: Wilton NSW

Cost:$20, includes coffee/tea and Christmas treats

What better way to spend an evening….email me at gdimicco@bigpond.com  or call 0413 444 334 for more details and come along and join us for a night of fun, treats and creativity!

Gift to those that bring a friend!

A Sale to ‘Die’ For

I am so excited about this sale as the Big Shot has been at the top of my list for a long time and now I can’t wait to get my hand on it.

For those of you that have also been wanting one now is the time, during November you can get 10% off select Big Shot dies-(and a Big Shot Bundle if you don’t already have one), no other purchase necessary !
Scalloped Heart of Hearts Embosslits Die
Flower Burst Embosslits Die
Manhattan Flower Textured Impressions Embossing Folder
Petals-a-Plenty Textured Impressions Embossing Folder
Elegant Lines Textured Impressions Embossing Folder
Buttons #5 Sizzlits Die
Pillow Box Bigz Die
Beautiful Butterflies Bigz Die
Scallop Square Duo Bigz Die
Mover & Shapers Punch Windows
Tasteful Trim Bigz XL Die
Petal Cone Bigz L Die

Don’t have a Big Shot? Get 10 percent off the exclusive Big Shot Bundle!

Big Shot Die-Cutting Machine
Scalloped Heart of Hearts Embosslits Die
Manhattan Flower Textured Impressions Embossing Folder
 

Nov2011_BigShot_AU_flyer

Hoot Hoot!

I have always thought that owls are cute so you can imagine my delight when I came across the owl punch that soon placed itself up high on my wish list (which is now becoming my NEED list!) and finally got just before I became a demo.

Looking for some inspiration to bring the owl to life, I can across a blog (http://darlenedesign.com/wordpress) that had most gorgeous Owl Window card, I didn’t make the window and used slightly different colour and theme, however still a cute little card just the same! This did take quite some time to do, so definitely for when you need to get lost in your craft after a hard week.

Card Stock: Soft Suede, Chocolate Chip, Garden Green

DSP: Cottage Garden

Ink: Chocolate Chip, Garden Green

Punch: Owl, Scallop

Soft Finishings

Last night I  finally put my tools down at 12.10am, so definitely creating by the light of the moon. I just couldn’t stop and wanted to see my project finished before I went to bed so I could show my daughter Alyssa when she woke and share it with it you on my blog.

My inspiration came from searching through hundreds of pictures from Stampin’ Up! creators across the globe and marvelling at their technique to add depth to their cards. This is done by using daubers which are little sponge tips that fit on the end of your finger which allow you to have better control.

Page 147 on the Ideas Book & Catalogue 2011-12, $20.95 for a pack of 12.

This card is a great one to make as you can use those snippets of paper that you have left over, which I had from the bookmarks I  made last week. I used the sponge daubers around the edges of each paper to soften the look.

This is another creation which shows that you don’t need much to start off with Stampin’ Up! as everything is matched perfectly to make it so much more easier to create a co-ordinated look. I also love the words in this stamp set…they ring true “love life and it will love you back”

Paper: Cottage Garden Designer Series Paper

Card Stock: Old Olive, Rich Razzleberry

Ink: Old Olive, Rich Razzleberry

Tools: Paper Cutter, Paper Snips

Starting Up

When I was first introduced to Stampin’ Up! I instantly fell in love with the papers, colours and stamps, but felt slightly overwhelmed as I didn’t know where to begin. There were so many projects I wanted to do and my wish list became longer and longer! My trusty friend Kathy who was holding her launch workshop at the time could see the excitement on my face crossed with the frustration with having to  narrow down my wish list.. Her advice to me at the time, as it is mine to you, just start with a stamp set that you like, and match it with a designer series paper , so off I went!

Today’s inspiration came from the using the Cottage Garden Stamp Set and Designer Series Paper which I had purchased early this year but was finding heart-breaking to cut into it, so I finally pulled the scissors out and closed my eyes and  I am so pleased with the results. I made this cute little card and also lots of bookmarks as I begin to prepare for Christmas and working on building up a stock of ‘appreciation gifts’.

Card stock used is Rich Razzleberry and Old Olive and few Rhinestone brads.

You can achieve different effects using the same Designer Series Paper and to complete these projects, I only used 3 pieces of card stock and 2 pieces of the DSP so a little goes a long way!


These flowers are so simple to make, using the Cottage Garden stamp set, and Rich Razzleberry ink, I stamped a number of times without re-inking which gives you the different shades. I then cut around the edges and hold them all together with a Rhinestone brad.